Migrating an AWS External Key Store to a New Eviden KMS Instance
This guide describes how to migrate an AWS External Key Store (XKS) from one Eviden KMS instance (Server A, the source) to another (Server B, the target). This is typically required when moving to a new server, a new region, or upgrading infrastructure.
The migration must be performed with minimal downtime. During the transition window, AWS KMS marks
the key store as DISCONNECTED, meaning any AWS service that attempts to use an XKS key will
receive a KMSInvalidStateException until the connection is restored on Server B.
Prerequisites
- Server B must be deployed and configured with AWS XKS enabled (see the XKS deployment guide).
- You must know the AWS principal ARN that was granted permissions on each key (e.g.
dynamodb.amazonaws.com,arn:aws:iam::123456789012:user/Alice). - The SigV4 credentials configured on Server B must match (or be updated in) the AWS XKS key store settings.
Step 1 — Export all XKS keys from Server A
On Server A, export every key used by the XKS integration in json-ttlv format (the default).
This format preserves all KMIP metadata and can be re-imported identically on Server B.
For each key (replace <KEY_ID> with the actual unique identifier or tag):
# Export a single key to a local file
ckms -c /path/to/server_a.toml \
  sym keys export \
  --key-id <KEY_ID> \
  keys/<KEY_ID>.json
Security note: The exported file contains the raw key material in KMIP JSON TTLV format. Store these files securely (encrypted storage, restricted filesystem permissions) and delete them once the import on Server B is complete.
Step 2 — Disconnect the XKS key store in AWS KMS
Before switching the endpoint, disconnect the external key store in the AWS Management Console or via the AWS CLI. This prevents AWS from sending requests to Server A while the endpoint is being updated.
Using the AWS CLI:
Confirm that the key store status is DISCONNECTED:
aws kms describe-custom-key-stores \
  --custom-key-store-id <CUSTOM_KEY_STORE_ID> \
  --query 'CustomKeyStores[0].ConnectionState'
Expected output:
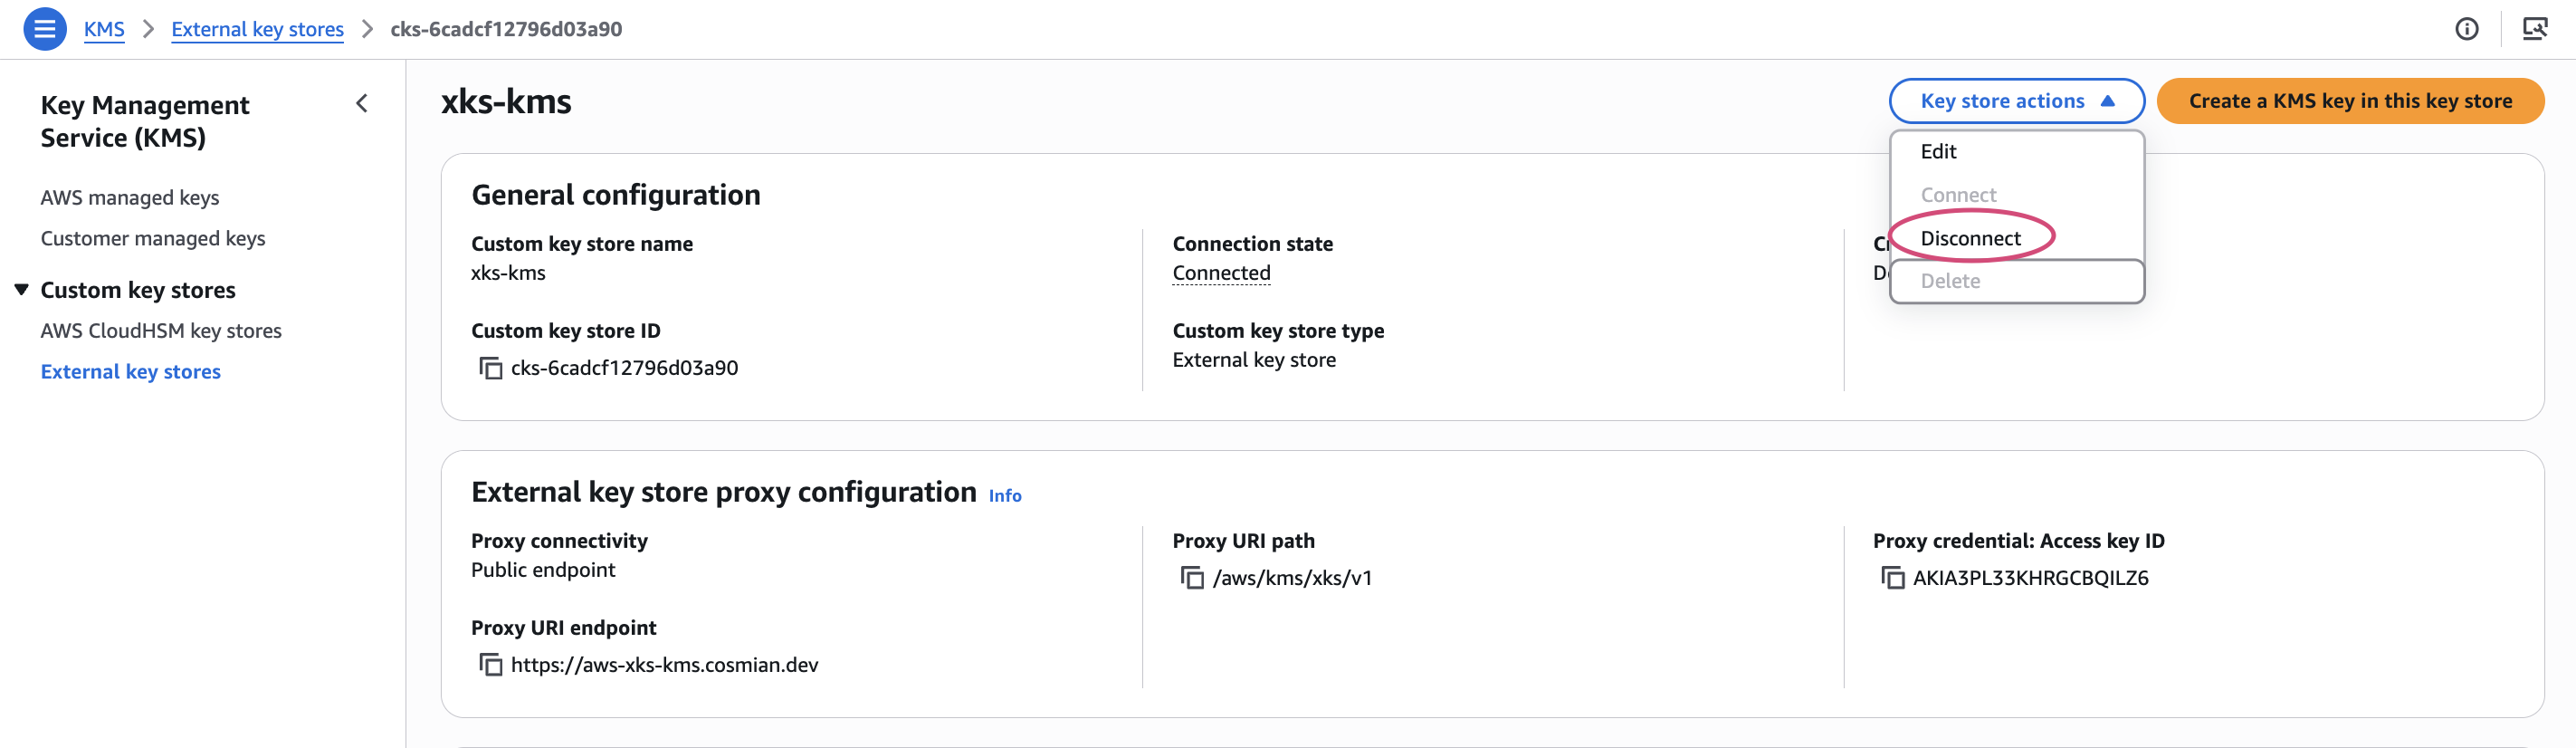
Alternatively, from the AWS Management Console, open the key store and click Key store actions → Disconnect:
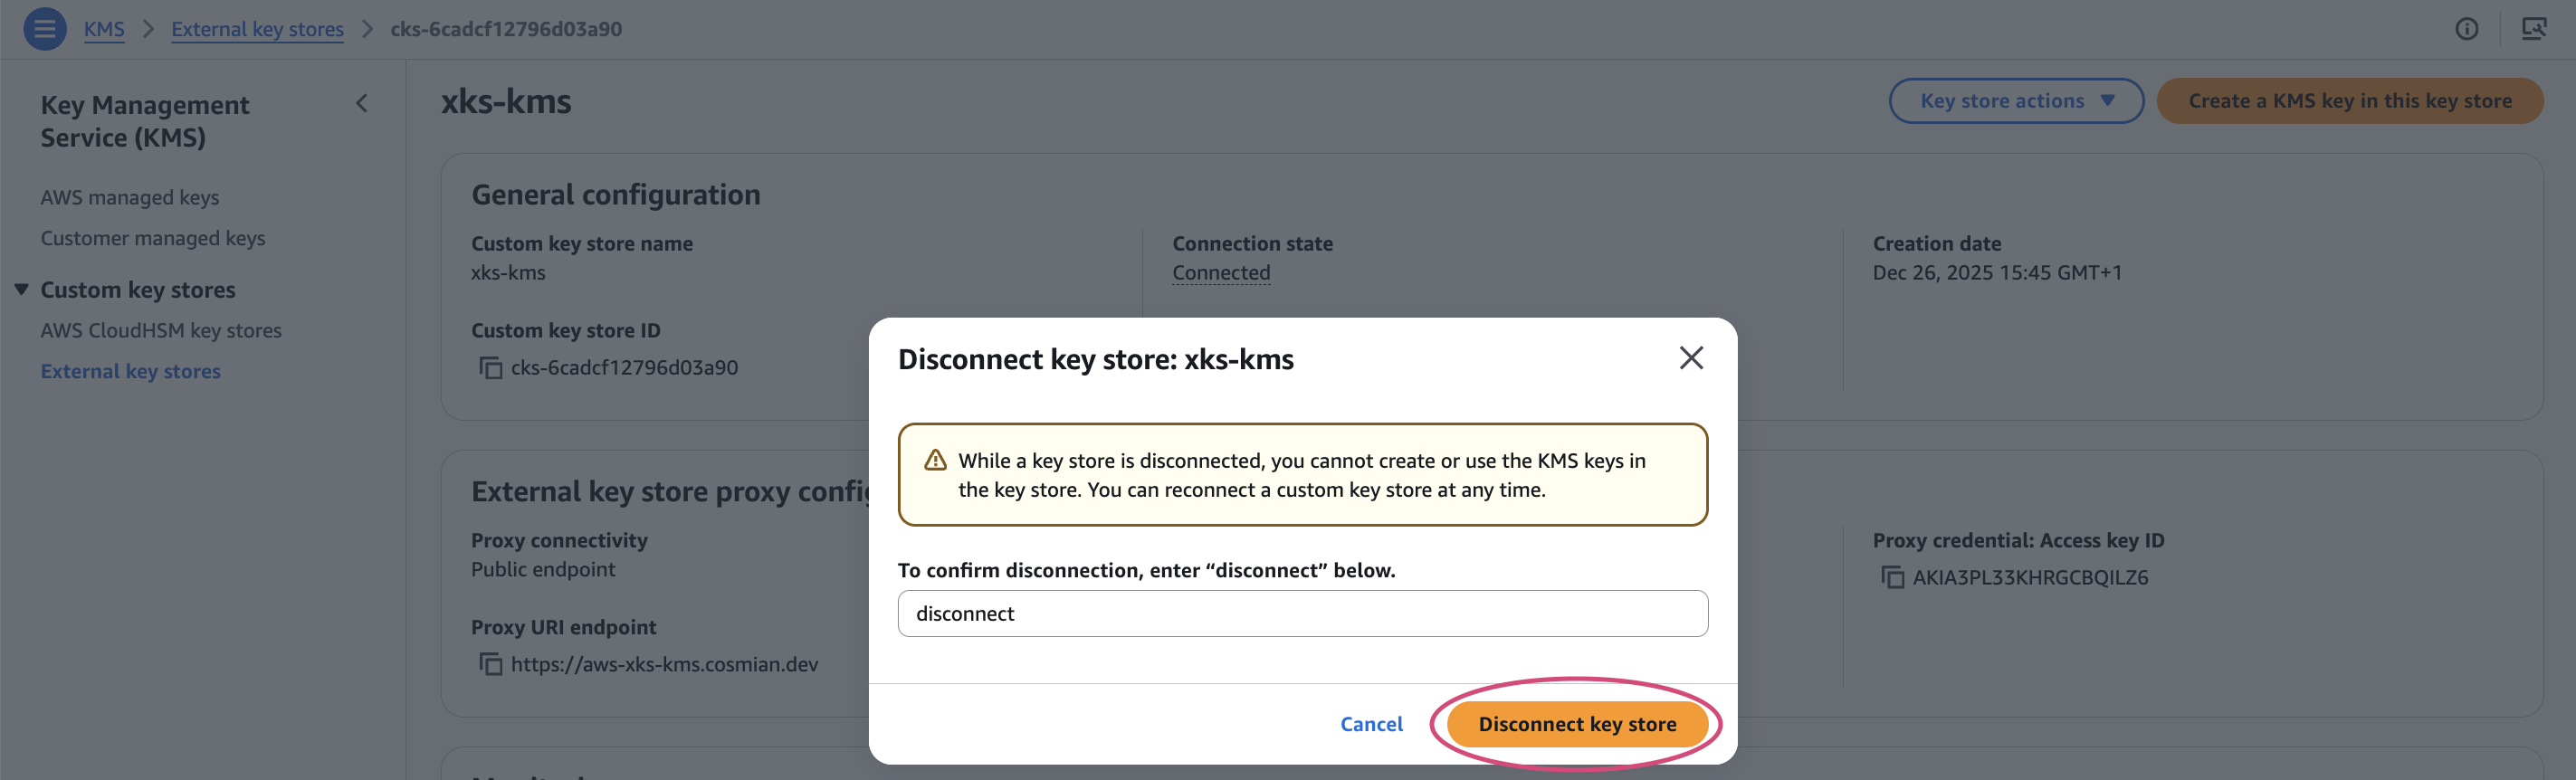
Type disconnect in the confirmation dialog and click Disconnect key store:
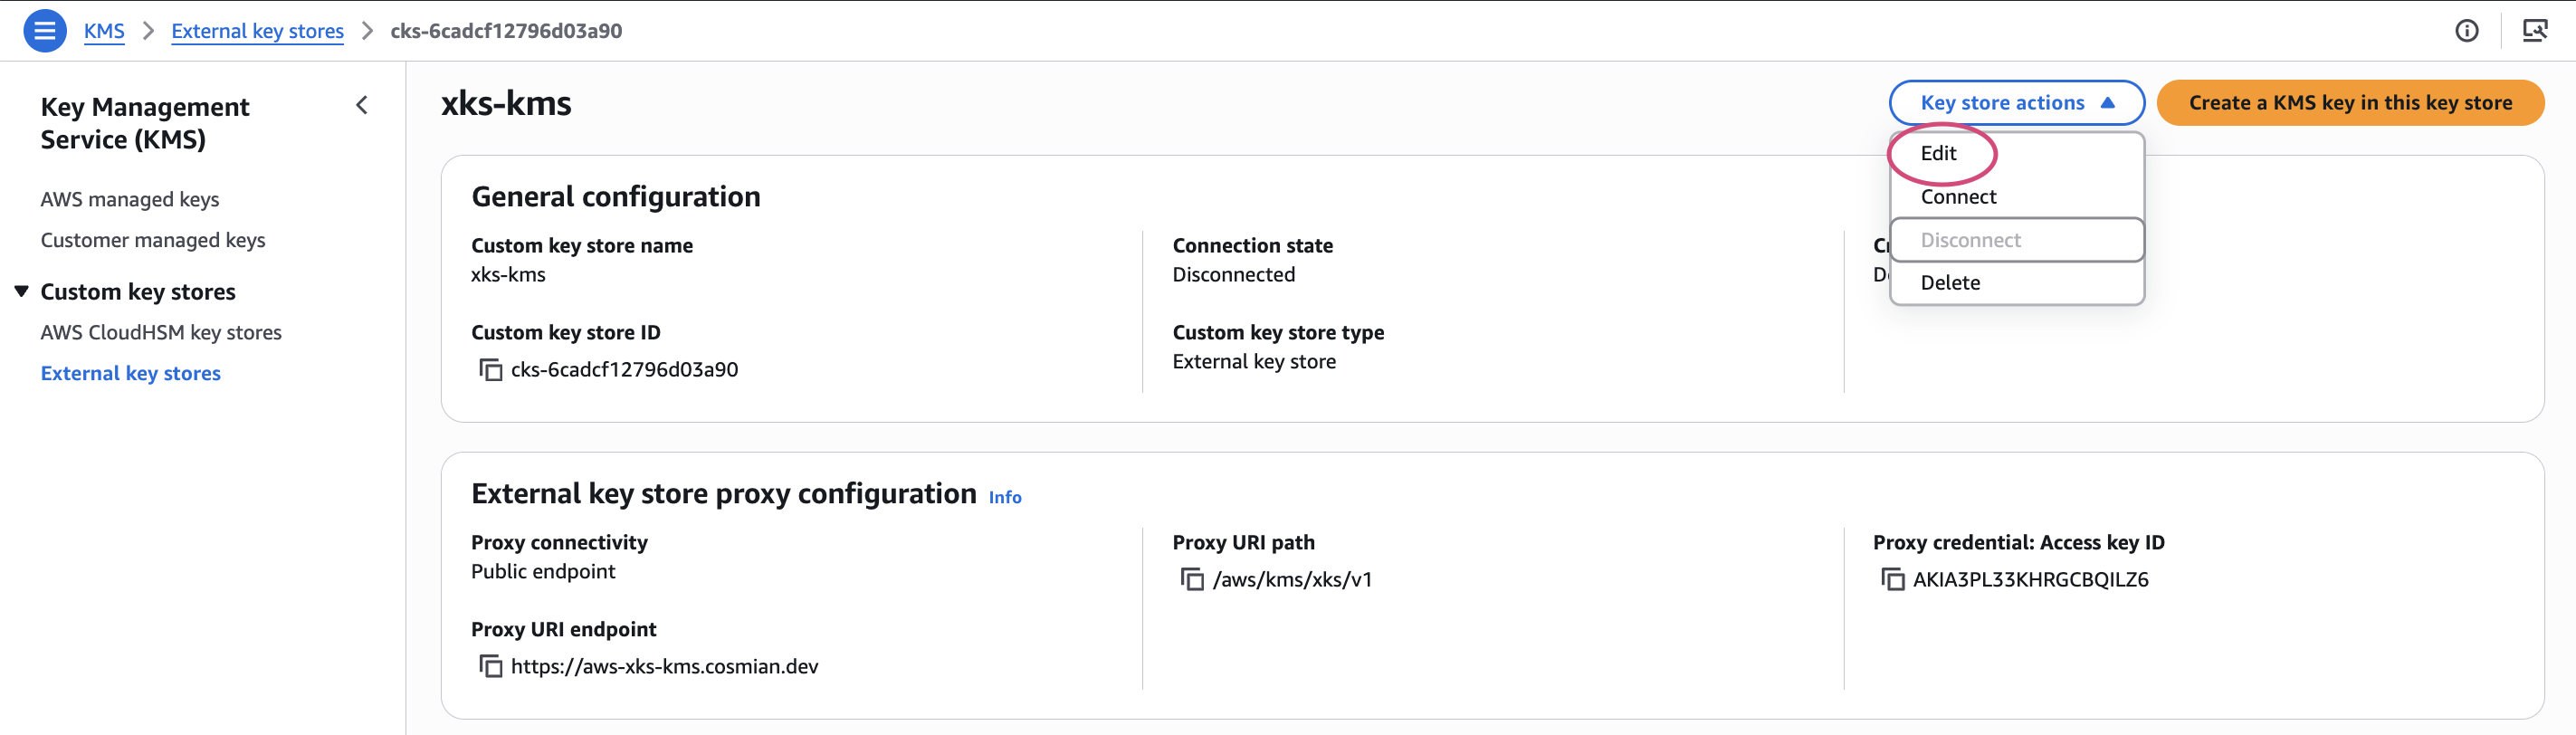
A success banner confirms the key store is now disconnected:

Step 3 — Configure Server B
Ensure Server B’s configuration file contains the correct AWS XKS parameters. The SigV4 credentials must match the values registered in the AWS key store configuration. If you are rotating the credentials, update both the KMS config and the AWS key store settings in the same operation (step 4).
[aws_xks_config]
aws_xks_enable = true
aws_xks_region = "eu-west-1"           # region where your new KMS is deployed
aws_xks_service = "xks-kms"
aws_xks_uri_path_prefix = "/aws/"
aws_xks_sigv4_access_key_id = "YOUR_AWS_KEYID"
aws_xks_sigv4_secret_access_key = "YOUR_AWS_SECRETKEY"
aws_xks_kek_user = "admin"
Start (or restart) Server B after updating the configuration.
Step 4 — Update the XKS proxy URI in AWS KMS
Update the external key store to point to Server B’s public endpoint. This can be done via the AWS Management Console (KMS → Custom key stores → Edit) or with the AWS CLI:
aws kms update-custom-key-store \
  --custom-key-store-id <CUSTOM_KEY_STORE_ID> \
  --xks-proxy-uri-endpoint "https://<SERVER_B_PUBLIC_HOSTNAME>" \
  --xks-proxy-authentication-credential \
    "AccessKeyId=YOUR_AWS_KEYID,RawSecretAccessKey=YOUR_AWS_SECRETKEY"
If you are keeping the same SigV4 credentials, the
--xks-proxy-authentication-credentialargument can be omitted.
Alternatively, from the AWS Management Console, click Key store actions → Edit:
Update the Proxy URI endpoint field with Server B’s hostname, then click Update external key store:
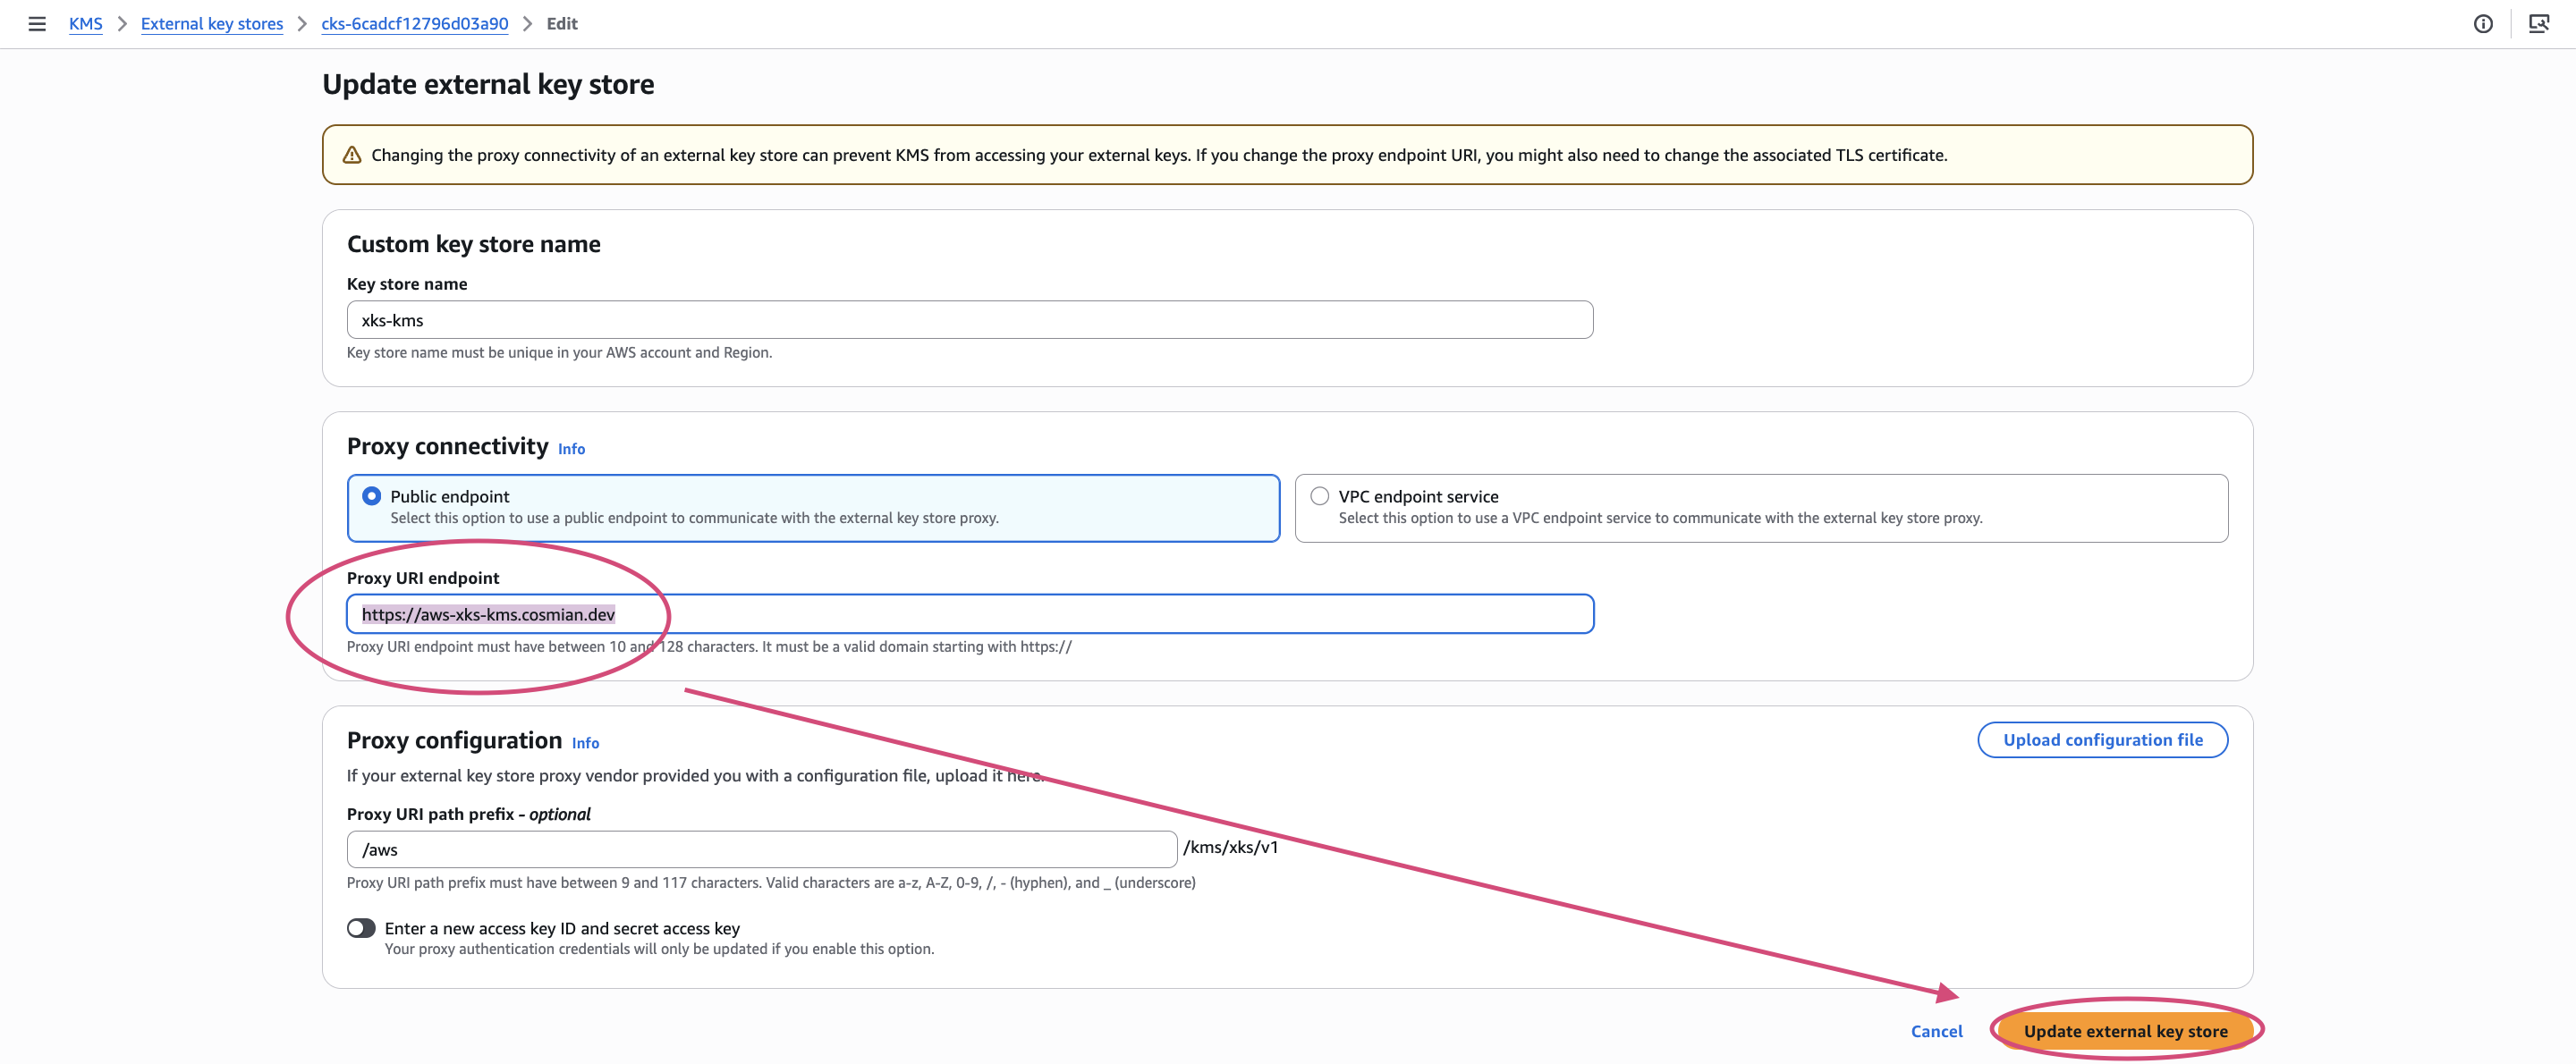
Check the acknowledgement checkbox and confirm:
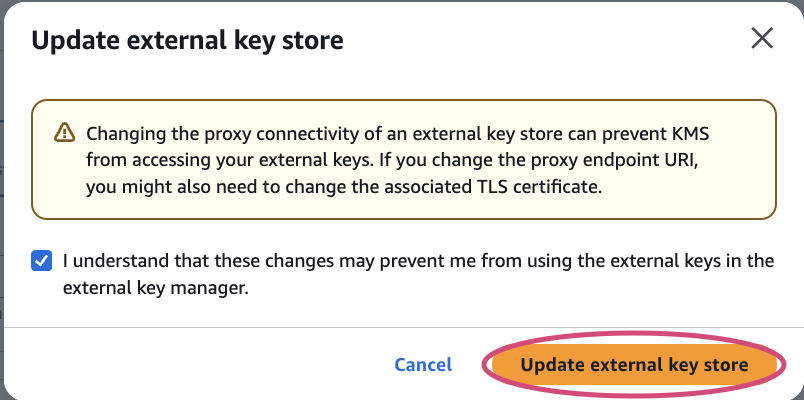
A success banner confirms the endpoint has been updated:

Step 5 — Import keys on Server B
On Server B, import each key exported in step 1. The --key-id parameter must preserve the
exact same unique identifier that was used on Server A, because AWS KMS references keys by their
ID in the XKS metadata endpoint path (/kms/xks/v1/keys/{key_id}/metadata).
Repeat for every XKS key.
Step 6 — Re-grant access rights on Server B
The Eviden KMS access control is per-instance: permissions granted on Server A are not transferred
automatically. For each imported key, re-grant the operations required by AWS KMS
(get_attributes, encrypt, decrypt).
# Grant the required permissions to the AWS principal ARN
ckms -c /path/to/server_b.toml \
  access-rights grant \
  --id <KEY_ID> \
  <AWS_PRINCIPAL_ARN> \
  get_attributes encrypt decrypt
Step 7 — Reconnect the XKS key store
Once Server B is ready and all keys are imported with the correct permissions, reconnect the AWS external key store:
Poll until the status returns CONNECTED:
aws kms describe-custom-key-stores \
  --custom-key-store-id <CUSTOM_KEY_STORE_ID> \
  --query 'CustomKeyStores[0].ConnectionState'
Expected output:
If the connection fails, check Server B’s logs for SigV4 authentication errors or TLS issues. Verify the
aws_xks_sigv4_access_key_idandaws_xks_sigv4_secret_access_keyvalues match exactly what was provided toupdate-custom-key-store.
Step 8 — Verify the migration
Test an encrypt/decrypt round-trip through AWS KMS using one of the migrated keys to confirm end-to-end connectivity:
# Encrypt a small test payload
aws kms encrypt \
  --key-id <AWS_KMS_KEY_ARN> \
  --plaintext "SGVsbG8gV29ybGQ=" \
  --output text \
  --query CiphertextBlob \
  > /tmp/ciphertext.b64

# Decrypt it back
aws kms decrypt \
  --key-id <AWS_KMS_KEY_ARN> \
  --ciphertext-blob fileb://<(base64 -d /tmp/ciphertext.b64) \
  --output text \
  --query Plaintext | base64 -d
Expected output: Hello World
Post-migration cleanup
Once the migration is validated:
- Delete the exported key files from your local filesystem:
-
Shut down Server A (or reconfigure it to no longer serve the XKS endpoints).
-
If applicable, revoke access rights on Server A to prevent any residual use: